03 March 2019

Patti getting in some practice at the cabin.  The little Ruger 10-22 has been
fitted with sights that replicate those on an AR-15.

This is what a steer looks like packaged and frozen.

A barred owl I met along the road!

We buy these nice berries each spring and freeze them along with the ones we grow.
This is two 10-pound boxes.

This bobcat was captured on one of our trail cams near the cabin.

A summer view of the cabin.  C'mon summer!!

Our neighborhood, just north of our cabin.

Hiking at a nearby state forest.

I found this hummingbird feather!

Our neighbor raises turkeys commercially.  This meat is from some they 'sampled' for fat content.
The meat was packaged into smaller batches and frozen.
Good stuff!

From a hiking trip with my wife to Glacier National Park.
This is on the trail to Cracker Lake.
It's worth it!!!


30 July 2016

Some Catching Up!


Some good split firewood

The finished cabin.  Doing some weed whacking.

The cabin with one of the rope swings.

A view of the interior.

The main solar panel.  The small panel at upper left powers an exterior light.

A view showing the solar panel and the LP tanks.
 The small square above the LP tanks will accommodate a stove pipe.

The privy.

11 September 2015

19 June 2015

Check out the latest issue of Backwoods Home Magazine!

Friends,  I've been writing for Backwoods Home Magazine for, well, since they and I were a lot younger!  They've been kind enough to publish dozens and dozens of my articles over the years.  That writing was the impetus for compiling, editing, expanding, and adding to create the book "The Self-Reliant Homestead".

In their latest issue, they have printed an article I recently submitted on the building of our off-grid cabin!  I am also working on an additional installment or two on  completing the cabin interior, and on the electrical / heating / water set up that is underway.  I hope you will check out that great magazine.  It's been around for a long time, with good reason.


Find them at www.backwoodshome.com . Of course, I encourage you to subscribe!

26 February 2015

More Work On the Cabin!

Well, it seems like I've done it again.  Another long, dry spell without posting.  Like a lot of the country, we've been in the icy grip of winter and we're way past wishing Spring would arrive.  We've had a rough February, as it seems that most of the winter has been saved for these past few weeks. As weather permits, we've been continuing to work on the cabin, and I've been designing the modest off-grid electrical system for it.

Below are a few pictures of progress on the cabin.  As spring arrives, We'll be finishing up the cabin itself and I'll be adding a water system, a privy, and an outdoor shower.  Please stay tuned!

The cabin is coming along.  Here, the house wrap, windows, and doors are installed.

With no electricity on-site, we've relied on our generator and a gas powered air compressor to run the tools.

We got a good deal on three of these brand new windows.

Here you can see the LP Smart Side (R) siding installed.
The small square high on the wall is where the stove pipe will exit.

In addition to warming us up, we used the kerosene heater to heat our tea and soup.
The small piece of flashing was hung over the grill to direct the heat upwards
towards the soup and tea kettle.

The walls have been insulated;
 here I staple in the thick batts of insulation in the ceiling.


01 November 2014

Progress on the Cabin!


The past couple of days have been hectic ones.  My friend for whom I work part-time brought his crew over and they did the lion's share of work on erecting our cabin.  I helped where needed, fetched lumber, held the 'dumb end' of the tape measure, cut some boards, etc.  Friday was cold, windy, and wet...a fairly miserable day, but the guys plugged away throughout the day.
Treated plywood went down first.  Then came a layer of insulation board and a 3/4" waterproof floor decking.
The wall framing went quickly with all hands assisting.
Inside looking out. It snowed on us this day.
Saturday was much nicer, weather wise.  It was still cold and blustery, but drier!  A lot of good work got done by all hands.
Today, the roof went on.
The metal roof goes on quickly.
I think we'll really enjoy the front and back porches!
The boys gathered up the scraps for a fire, then enjoyed the chili soup my wife brought over!
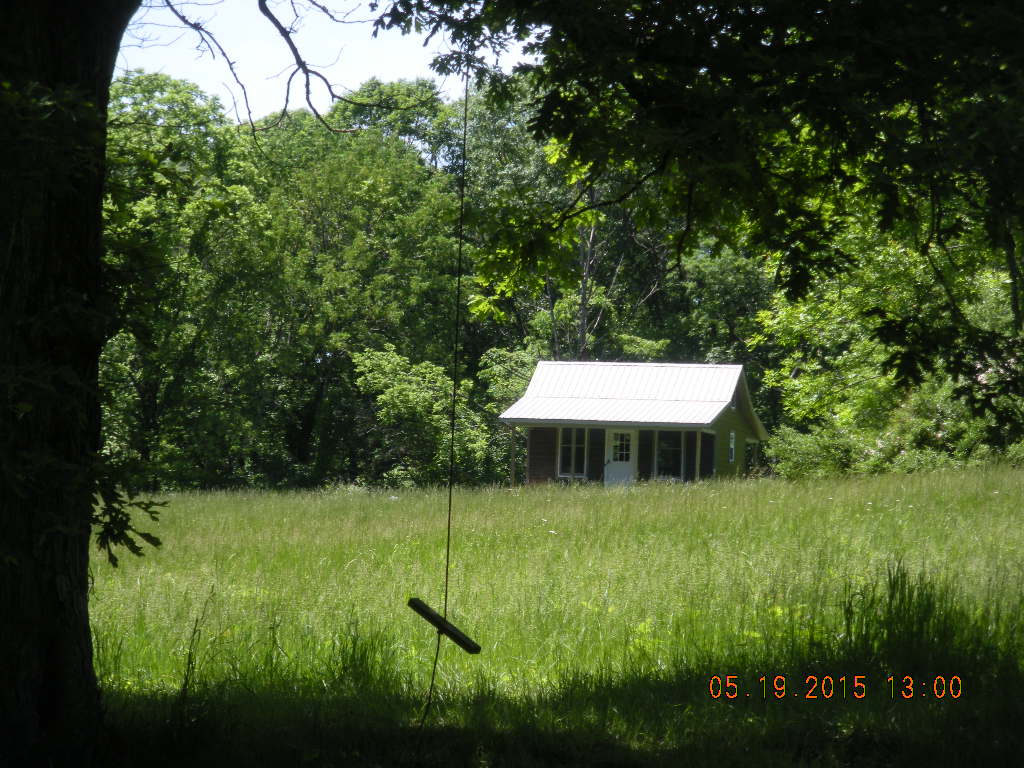
This is a view of the cabin as we enter the field.
Next, we'll do a bit of wiring--one circuit for a few 12 volt items and lights, another with a few outlets to use when we have our generator with us.  I'll be adding the wall insulation soon as well.  The cabin will have house wrap applied, then the siding.  It's moving along nicely, but there is plenty more to go.  I'll try to keep you posted.

First Snow of the Year!

We got a brief spell of snow on the afternoon of 31 October!  Here is some photographic proof!
FIRST SNOW OF THE YEAR! 

29 October 2014

Drying Some Pears

The old pears trees have a bumper crop this year.  We stopped and picked up a 5-gallon bucket full the other afternoon.  These pears are Keiffers, an old homestead variety.  I am attaching a link to a site I found that can give you more information on the fruit:  http://www.ediblecommunities.com/louisville/august-september-2014/in-the-garden-key-to-tasty-kieffer-pears-chillin.htm

I've learned over the years, that these pears are hard as a rock when you pick them or grab them up off the ground.  To make them ready to eat or preserve, I placed them in a couple of cardboard boxes and closed the lids.  After just a few days, they ripened nicely.  In the photos below, you can see how I processed them.  A couple of notes on the process:  While using my apple peeler to slice the fruit, I held the paring blade back so that it would not make contact with the fruit.  The ripe pears were too soft to peel and the peelings are good on the dried fruit.  So, as I cranked, I was simply coring and slicing the pears.  Next, they went into a bath of good old 7-UP !  The citric acid in the drink helps to keep the sliced fruit from turning brown on the trays and the residual sugar only enhances the fruit's natural sweetness.  If you don't like using soda pop in the process, a weak solution of lemon juice and water also works well.

Processing pears for the food dryer

I held the paring blade away from the soft pears as I cored and sliced them.

After a few minutes in the 7-UP bath, the slices were arranged on the dryer trays.

Here is the sliced fruit in the dryer, ready to close the door.
The dried pears are tasty and just one more way of using what you have on the home place.  My wife also plans to make a batch of what we call "pear honey", sort of a pear version of apple butter.